Happy New Year! Today’s our last day of break, and we are squeezing out all the goodness we can. As much as the return to school routine will be good for our productivity and sense of normalcy, it has been so nice to be home and enjoy a more relaxed, slow schedule.
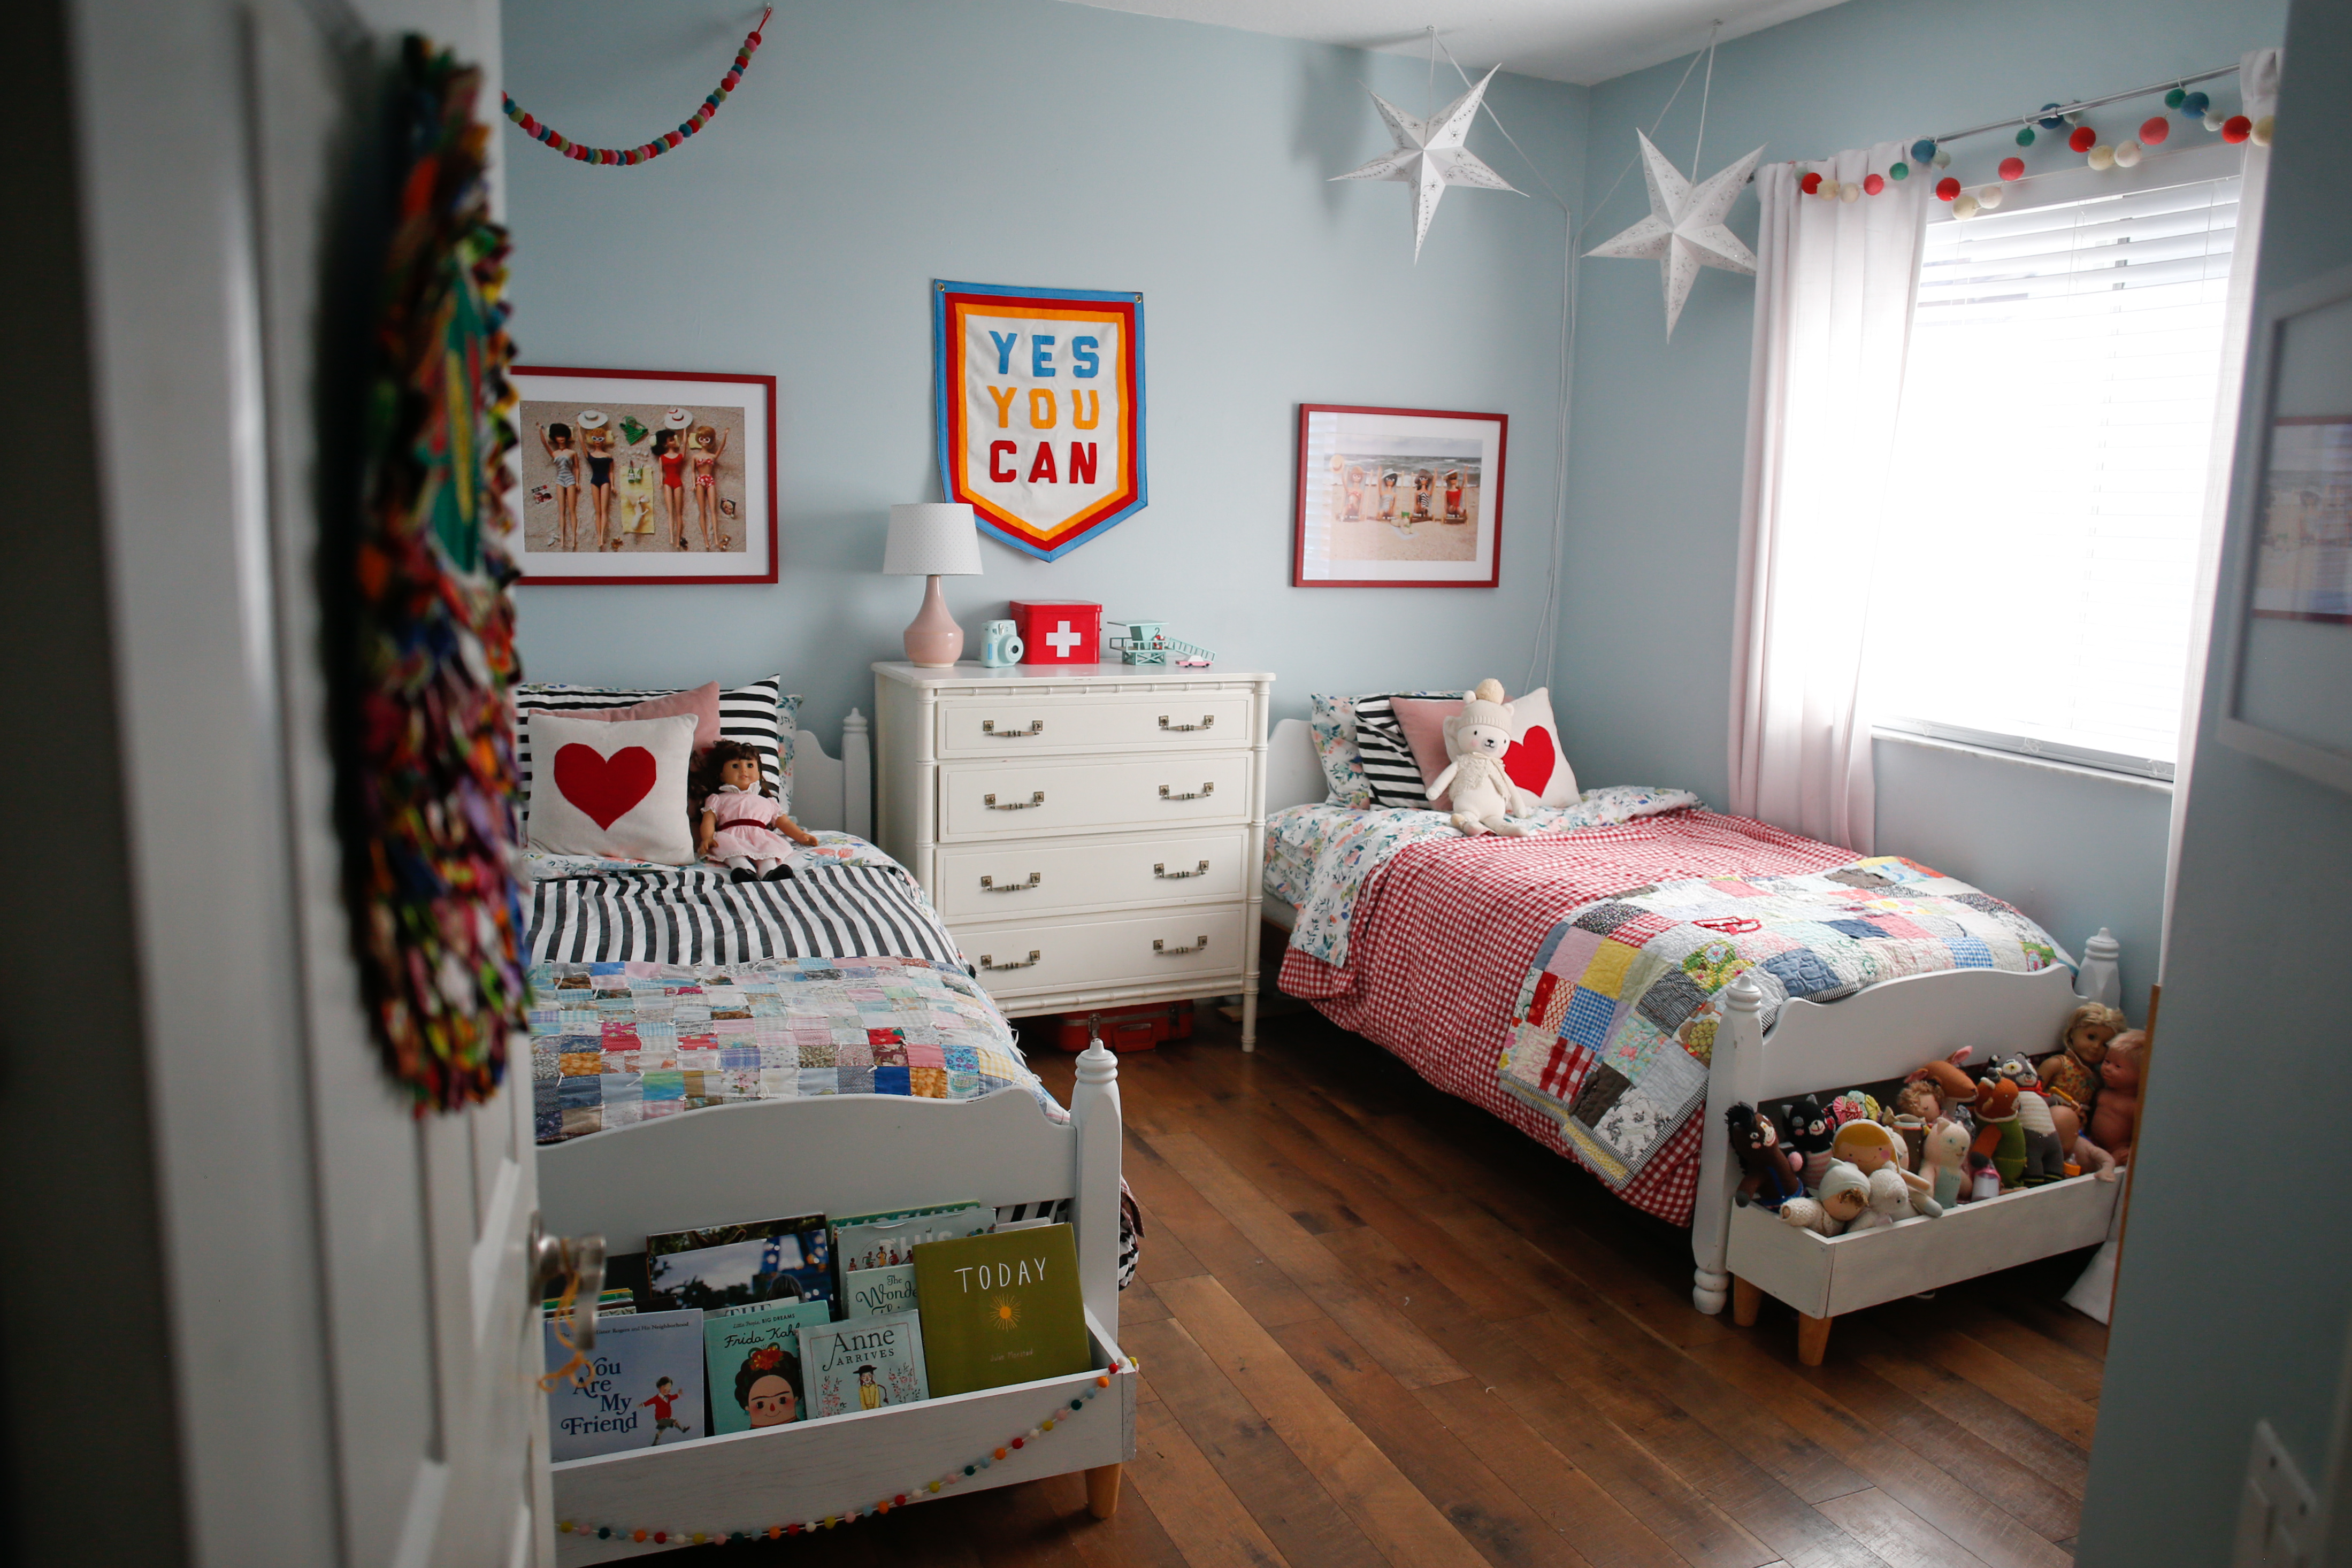
We’ve slowly switched our home back from Festive North Pole to Clean & Simple New Year mode which includes the usual January purging, rearranging, and taking on of mini projects (I painted the dining room this week). One of last month’s projects I never shared though was the book shelves I made for the end of Nella’s beds–a project I’m particularly proud of because I figured it out myself, with no help from the People Who Build Things in my life, even though it involved things I’m normally intimidated by like measuring and buying lumber. I always feel like the workers in Home Depot take one look at me in the lumber aisle and think, “Oh honey, you don’t belong here.” But I do! I wore a baseball cap and brought a drawing and pretended to calculate measurements while I was shopping for the right boards; and when I asked for help, they talked to me like I knew what I was doing!
After attempting cute wall displays of books in Nella’s room, we had to get rid of the wall shelves because A: they kept pulling out of the wall, even though we used anchors; and B: we didn’t really have the wall space for them. I had hung them on the sides of the twin beds, but the books got kicked in the night and–well, we tried. The books got moved to a giant basket that sat next to another giant basket of stuffed animals, but I still wanted some kind of book shelf. I love when children’s books are displayed because not only are the covers so beautiful, but books that are displayed get read more often. They’re so inviting! Because of the way Nella’s room is laid out, I envisioned some kind of low shelf on legs at the end of her bed but couldn’t find what I wanted anywhere. So I did some measurements, found some furniture legs on Amazon, bought some boards and built it myself.
I loved the finished product so much, I built another one for the other bed for perfect symmetry. So now there’s a shelf for all the books and a shelf for all the lovies.
Is it a little wonky and imperfect? Yes! But if you’re intimidated by perfect D.I.Y.s and are okay with a wonky little project that’s doable, this one’s for you.

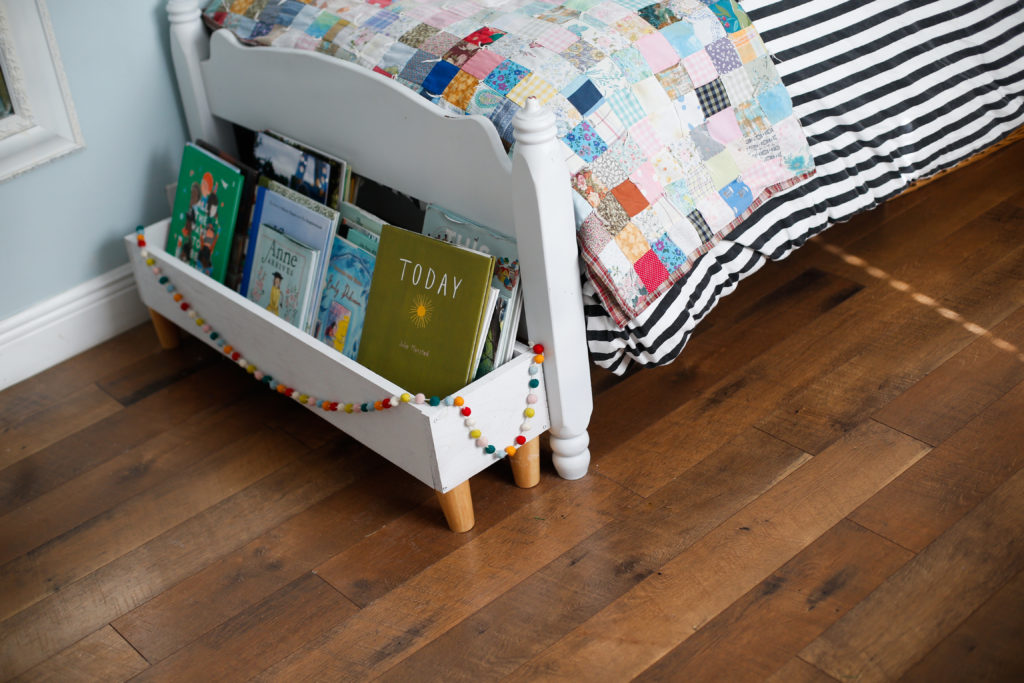
The shelves are skinny enough that they don’t take up a lot of space and yet they fit so many books and lovies. Here’s what you’ll need. I measured and built these according to the measurements of Nella’s twin beds, but you could adjust the length for what you need. You can use any wood (even plywood for a really inexpensive project)–I went with oak. I had one 7.25 inch width board cut to 36 inches for the base, and then had a 5.5 inch width board cut into four pieces (two x 36 in., two x 8.75 in) for the sides.
MATERIALS
1 – 7.25 in width board cut to 36 inches
2 – 5.5 in width board cut to 36 inches
2 – 5.5 in width board cut to 8.75 inches
2 inch wood screws
Electric Drill/Screwdriver
4 Furniture Legs (I used these 4 in. ones from Amazon)
Fine Sandpaper
Spray Paint (I used white chalk spray paint)

I took a few pictures of the building process but accidentally deleted that camera card. However, it’s pretty self explanatory. I sat in my driveway and set up the “box”–base first, front and back boards in place second, and then the sides to complete it–and marked with a pencil where I wanted my screws to go. Using a drill bit slightly smaller than my screws, I drilled holes for the screws and then gradually attached boards and secured them with screws. Once the box structure was complete, I sanded any rough edges and added 3 coats of spray paint. When everything was dry. I positioned where I wanted the legs to go, marked with a pencil, drilled a small hole and then screwed the legs on. This is no HGTV instruction manual, but I promise if I can do it, you can too. See how it’s a little wonky? Character!

I draped some garland for a little color, and Voila!

Time to add the books…

…and the stuffed animals…

…the symmetry makes me so happy!

You can’t tell from the picture, but there’s probably 30-40 books in here.


And with the hodgepodge collection of baskets now gone, everything looks cleaner and there’s a little more space.

Hoping to tackle more simple projects like this this year and become a regular in the lumber aisle.


I love your projects so much Kelle! You inspire me!?
Perfect for my guest room, which is configured like this one. Thanks.
I love it!! I wanna know the lowdown on those Barbie beach framed pics! Did you do that?!
Ha! That’s what I wanted to know! 🙂 Amazing! Love the book boxes too.
You have inspired me! I have always been afraid to tackle projects like this. I am just going to jump in! I want to know where your shirt is from…so cute!
Great job! I would have never thought of doing it.