Enjoying the Small Things

Enjoying the Small Things

  • ABOUT
    • KELLE HAMPTON + ETST BLOG
    • Our Down Syndrome Journey
    • Down Syndrome: Our Family Today
    • PRESS
  • the book
  • The Blog
    • Make Stuff
    • Family
    • Favorites
    • Parenting
    • Parties
    • Style
    • Travel
  • Once Upon A Summer PDF
  • Printables
  • CONTACT

Delicious Fall Wassail

September 17, 2018 By Kelle

Good Morning! Ambassador of Fall here, checking in for Monday. This is it–the week with the actual first day of fall for those of you who like to follow the rules. As you know, I’ve been rolling out the red carpet for fall a little early to give it a proper welcome, of course. In doing so, I’m happy to report we found pumpkins at Trader Joe’s last week, and we simmered our second batch of wassail for the season over the weekend.

What’s this wassail you speak of, you ask? If you’re not familiar with wassail, basically it’s a hot mulled cider. My mom used to make it, and I associate it with all things fall and cozy. Traditionally, drinking wassail was an important part of “wassailing” in parts of England years ago–a Yuletide ceremony that involved singing and drinking and was believed to help bring a good cider apple harvest the following year. The word wassail actually comes from the Anglo-saxon phrase “waes hael” which means “good health.” This scene in Little Women summarizes all the wassail feels…deliciously cozy. And yes, sometimes when I make wassail, I reenact that scene.

Traditional wassail recipes have evolved over the years, and there are a number of different ways to make and serve it today. Years ago, wassail was made from mulled ale, curdled cream, eggs, roasted apples and winter spices, and was served from large pewter wassail bowls. Today, it usually involves hot apple cider, citrus of some sort, sugar and spices (cinnamon, nutmeg, ginger, cloves, allspice), and sometimes bourbon or whiskey is added.

I’ve used the same basic recipe over the years (although recently I’ve cut the brown sugar completely out of it because sugar is the dragon, and I am the dragon slayer). My kids finally like wassail too now, and I love that we only drink it in the fall and winter, so they’ll have all those cozy end-of-year memories with it.

Fall Wassail

3 cups apple cider
Juice from 1 orange (or 3/4 cup of orange juice)
Lots of Orange Zest (I love lots of pieces of citrus peel in my wassail, especially once it cooks down)
1/2 tsp. cinnamon
1/2 tsp. cloves
Optional: 1 tbsp. brown sugar, dash ginger, dash nutmeg, bourbon or whiskey
Float/Garnish: 2-3 cinnamon sticks, orange or apple slices, dried apple rings

Pour all that fall goodness into a pot, bring it to a boil, and then let it simmer for a while. Your kitchen will smell like the essence of Autumn.

Make it once, and you’ve already passed Wassail 101 and are ready for Advanced Studies Wassail which involves ditching the measuring and pouring a little of this and shaking a little of that into a pot. You can’t go wrong with variations of the ingredients–it will turn out delicious every time.

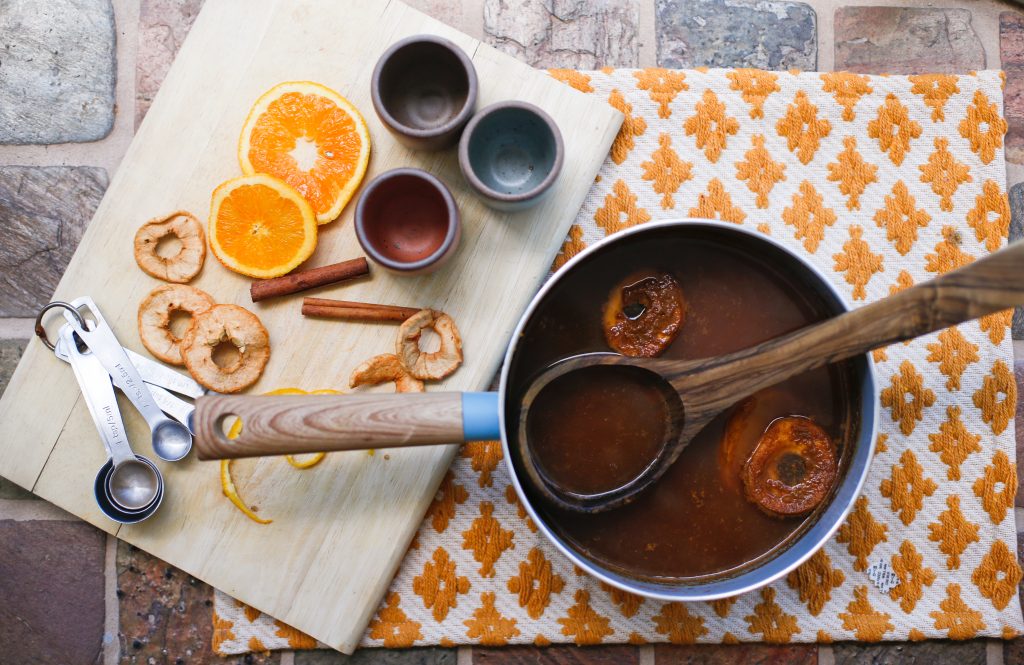
Best served with a big wooden ladle.


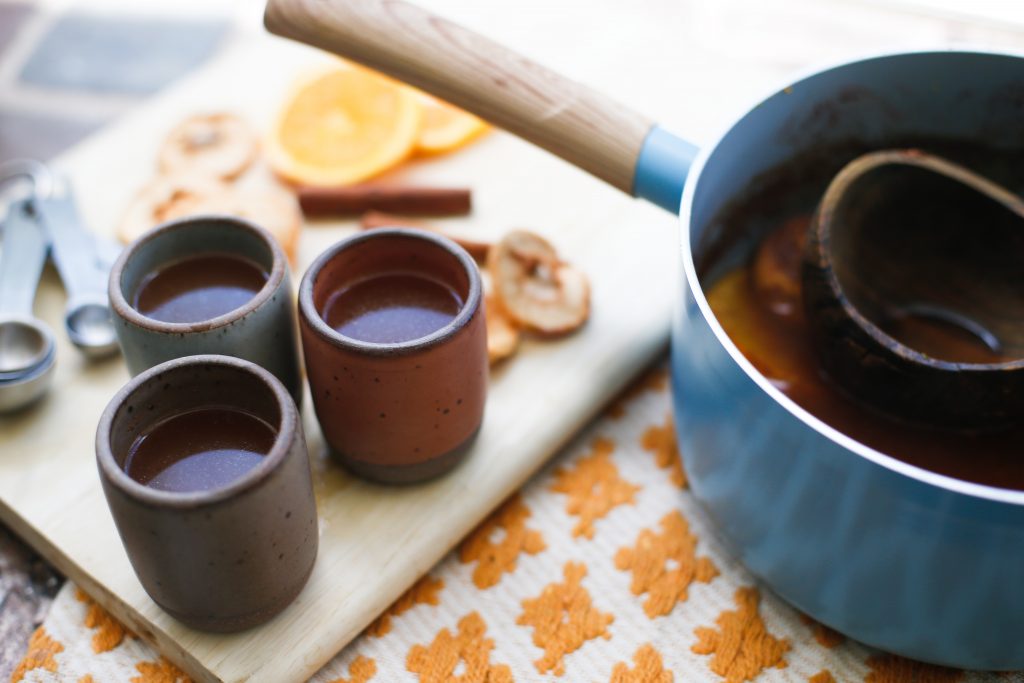
And how cute are these little pottery cups, perfect little sipping size for the kids. These are The Toddler Cup from East Fork Pottery. Everything they make is beautiful.

Garnish cup with a little apple ring.

I make a pot of wassail with our Halloween chili every year and pour a big travel mug to take trick-or-treating

You know what goes good with wassail? The 2018 Fall Playlist. I curated a big list of songs I’d have looping 24/7 if I were, say, trapped in a cabin in the mountains sipping wassail while I sat in a window nook, watching the leaves fall. You can also play it right from this post. Go ahead, give it a try…while your wassail is simmering.
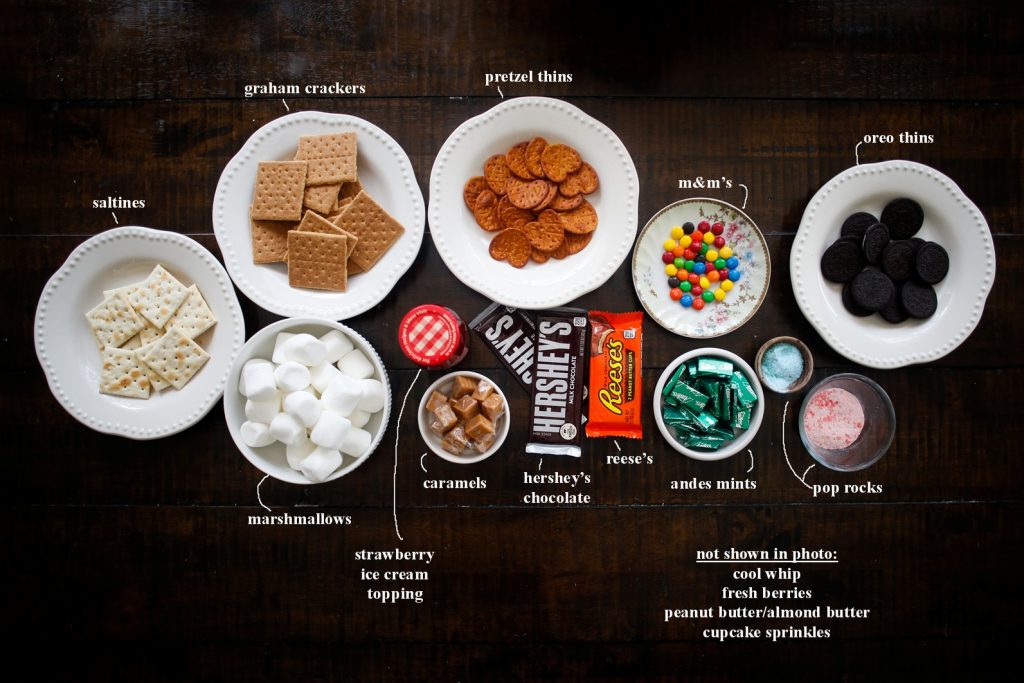

Filed Under: Make Stuff, Uncategorized 10 Comments

It’s Jewelry Day at the Summer Arts & Crafts Lodge!

July 16, 2018 By Kelle

One of my favorite things about summer–besides, of course, the enchanting woods and the lake and watching Parent Trap for the sixteenth time (never gets old)–is the fact that we craft a lot. Like slow, hours-long crafting sessions with no hurry to clean things up or move on to the next thing. I have a box of acquired craft supplies that I leave at my dad’s cabin every year, but I also plan out a few specific projects and ship some things early as well as bring a bag of supplies. This year, I put together an epic DIY jewelry bag and brought everything we’d need to make some really good stuff. I knew I wanted to experiment with resin jewelry this year too. My dad has a picnic table outside, so I set up all the supplies and basically yell an all-call for anyone who wants to come make things with us. This year’s jewelry making session was so much fun, and we got so many cute pieces we’ll actually wear from it.

As far as inspiration, any time I see jewelry I love online (Anthro, Free People, Etsy shops), I screenshot it to save for ideas.

What we brought:

Clay beads and pendants & wood beads
The best jewerly supplies I’ve found are from a little Esty shop called Oxbow Supply. I bought curved brass tube rings, terra cotta tubes (currently not in stock) and these beautiful blue clay fan pendants (also not in stock but but found them here).

Cording for stringing necklaces and bracelets
We use leather, hemp and silk (lots of different colors), all available in the jewelry aisles at any craft store. You can also get leather cording on Amazon here. Just check the diameter of your stringing material to make sure it fits in your beads. You can use any ‘ol string if you’re not picky.

Adjustable ring blanks (these ones are good quality, thick, silver plated)

Earring hooks

Beading wire (we used silver; available at any craft store or Amazon)

Needlenose pliers

Resin kit 

Resin molds
This silicon one (2-pack) was our favorite (slips out easy and has holes built in for pendants). This one is great for rings or you can slide wire into it before it sets to make pendants and earrings.

I strung the terra cotta beads and blue fan pendant with leather and tied on earring hooks with wire to make these beauties–so easy and fast to make:

Lainey designed and made these all on her own with the hemp cording, terra cotta beads an curved brass tube rings, all from Oxbow Supply:

But things got really fun when we pulled out the resin kit!

When I was researching how to make these, I got a little intimidated because it looked complicated and had all these instructions for not getting bubbles and how to set the resin properly. We just winged it on one try, and it was so easy–nothing to it, and none of our pieces got bubbles or had any trouble. Basically, you can set anything in clear resin–wildflowers, special pebbles, even cake sprinkles (those were my favorite pieces).

Here’s how we did it:

First choose all the items you’ll be casting and practice placing them in the molds to see how you want them. The kit comes with two bottles–the resin and the hardener. We only used about an 1/8 of our bottles to make all these pieces. In a plastic container (you’ll throw it out after use because it will get trashed), mix equal parts resin and hardener and stir well (we used a baby spoon we threw out after as well).

Before we placed our items, we dropped a few drops of the resin mixture in the mold to coat the bottom (what will eventually be the front) just a bit. Place your item in the mold and then pour enough resin mixture to finish filling the mold.

For the cake sprinkles, you can use a toothpick to make sure they’re mixed in the resin and evenly dispersed.

Once your molds are filled, you’ll need to let them set overnight. The resin mixture is really thick and syrupy, like melted hard candy and as it sets, it gets harder and harder, losing its stickiness toward the end.

After 5-6 hours, I pushed in ring blanks into the resin for the pendants I wanted turned into rings.

After ten or so hours, I placed  all of the molds in the freezer for about 5 minutes to help the charms pop out easily (they did).

(for pendants that don’t have holes already in them, you can push some wire into the top before they’re fully set)

They turned out sooooo cute!

For this one, we poured clear resin into the mold and then added a few drops of different colored nail polish and swirled it with a toothpick.

This one is my favorite.

And these cupcake sprinkle earrings.

Lainey loves her glitter ring.

Dash made a yellow flower ring he was in love with, but he lost it already before I had a chance to take a picture (my money’s on inside the chicken coop).

Verdict is: we’d totally do this again, and now I’m a little obsessed with finding more cool stuff to turn into jewelry. In the meantime, I’ll be running the Arts & Crafts Lodge all week up here at Camp Bliss.

Filed Under: Make Stuff, Uncategorized 6 Comments

Summer S’more Wars Night

June 6, 2018 By Kelle

Making s’mores is, for us, as synonymous with summer as sunshine itself. and while the epitome of a good s’mores night involves toasting marshmallows around the campfire with cousins in northern Michigan, we don’t wait until our trip to get started on our summer s’more memories. We have a s’mores maker that is really fun to pull out for family nights, but we actually made a fire in the fireplace the other night for our s’mores wars. Clarified, I made a fire in the fireplace the other night–Brett thought a fire in the fireplace in June in Florida with a bunch of people in our house was–and I quote–“a little bit ridiculous.” To which I replied, “Moments and memories, Brett.” And no, this isn’t the first time the “A little bit ridiculous” vs. “Moments and memories” discussion has come up in our home.

This year on our Summer Bucket List, we have “Concoct a New Kind of S’more” which started out as “Oh hey, let’s use a Reese’s instead of Hershey’s” and ended, as all the best ideas do, with a party and a plan that has, let’s say, expanded. 

So here’s how it goes. You invite some friends over. You spread out every possible thing you could turn into a s’more on a table. Think cooking show and the theme is creative s’mores. The rule is you have to keep one regular element of a s’more, but you can change anything else. So if you have a graham cracker base, you don’t necessarily have to have the marshmallow and the chocolate square. If you use a marshmallow, you can switch out the graham cracker, etc. Each contestant must invent a creative s’more, give it a name and list the ingredients. Contestants can then taste each other’s concoctions, give them a point value from 1-10, and whoever has the most points wins the S’more War and the recipe goes into the Family Hall of Fame S’mores Cookbook. Here’s what we used:

And favorites:

The Berry Bliss…(graham crackers, cool whip, fresh berries)

Lainey’s Monkey Butter Baby… (almond butter, cool whip and chocolate on graham crackers–sooo good!)

And Heidi’s Salty Delight–toasted marshmallow with chocolate in between salty pretzel crips with a fresh raspberry on top. HEAVEN. Other fun concoctions: “The Savage,” “Sweet Explosion” (it had pop rocks) and “The Schlooby Dooby Delight”.

And Nella’s gaze as she looks at a table of sweets? That is the look of love.

But I have to admit, my summer-loving heart still loves a classic s’more best.

We are in Austin, Texas this week cooking up some fun with Ruby’s Rainbow, and I can’t believe how HOT it is! Happy Summering!

Filed Under: Make Stuff, Uncategorized 9 Comments

  • « Previous Page
  • 1
  • …
  • 3
  • 4
  • 5
  • 6
  • 7
  • …
  • 23
  • Next Page »
  • Facebook
  • Instagram
  • Pinterest
  • RSS
  • Twitter

Popular Posts

Shop My Favorites

Keep In Touch

Bucket Lists

ARCHIVES

Archives


“One of the most emotionally stirring books I’ve ever read….a reminder that a mother’s love for her child is a powerful, eternal, unshakable force.”
Ree Drummond, The Pioneer Woman
  • Home
  • About this Blog
  • BLOG
  • BLOOM
  • Favorites
  • Parties
  • PRESS
  • CONTACT

Copyright © 2022 · Kelle Hampton & Enjoying the Small Things · All Rights Reserved