
In my secret quest to rid the world of carpet, we recently ripped the girls’ room’s hideous dark carpet that the dogs had taken full control of with their bladders in a revolt against the humans. As long as that carpet remained, there was nothing we could have done to that room to make it cute or cozy or anything outside the lines of living-in-a-litter-box. Once we replaced the flooring, it was finally time to give that room a little more love, so this past weekend we did a mini transformation. I had three main goals: 1) Carpet, be GONE! 2) Replace bulky, dark ceiling fan light fixture and 3) Incorporate subtle color with Lainey’s chosen wall color–pink. I also wanted to blend their age gap with a room that represents both little girl and big girl–some dolls and stuffed animals still neatly tucked away.
A quick phone picture mid-paint and pre-carpet-ripout:

And the finished product:
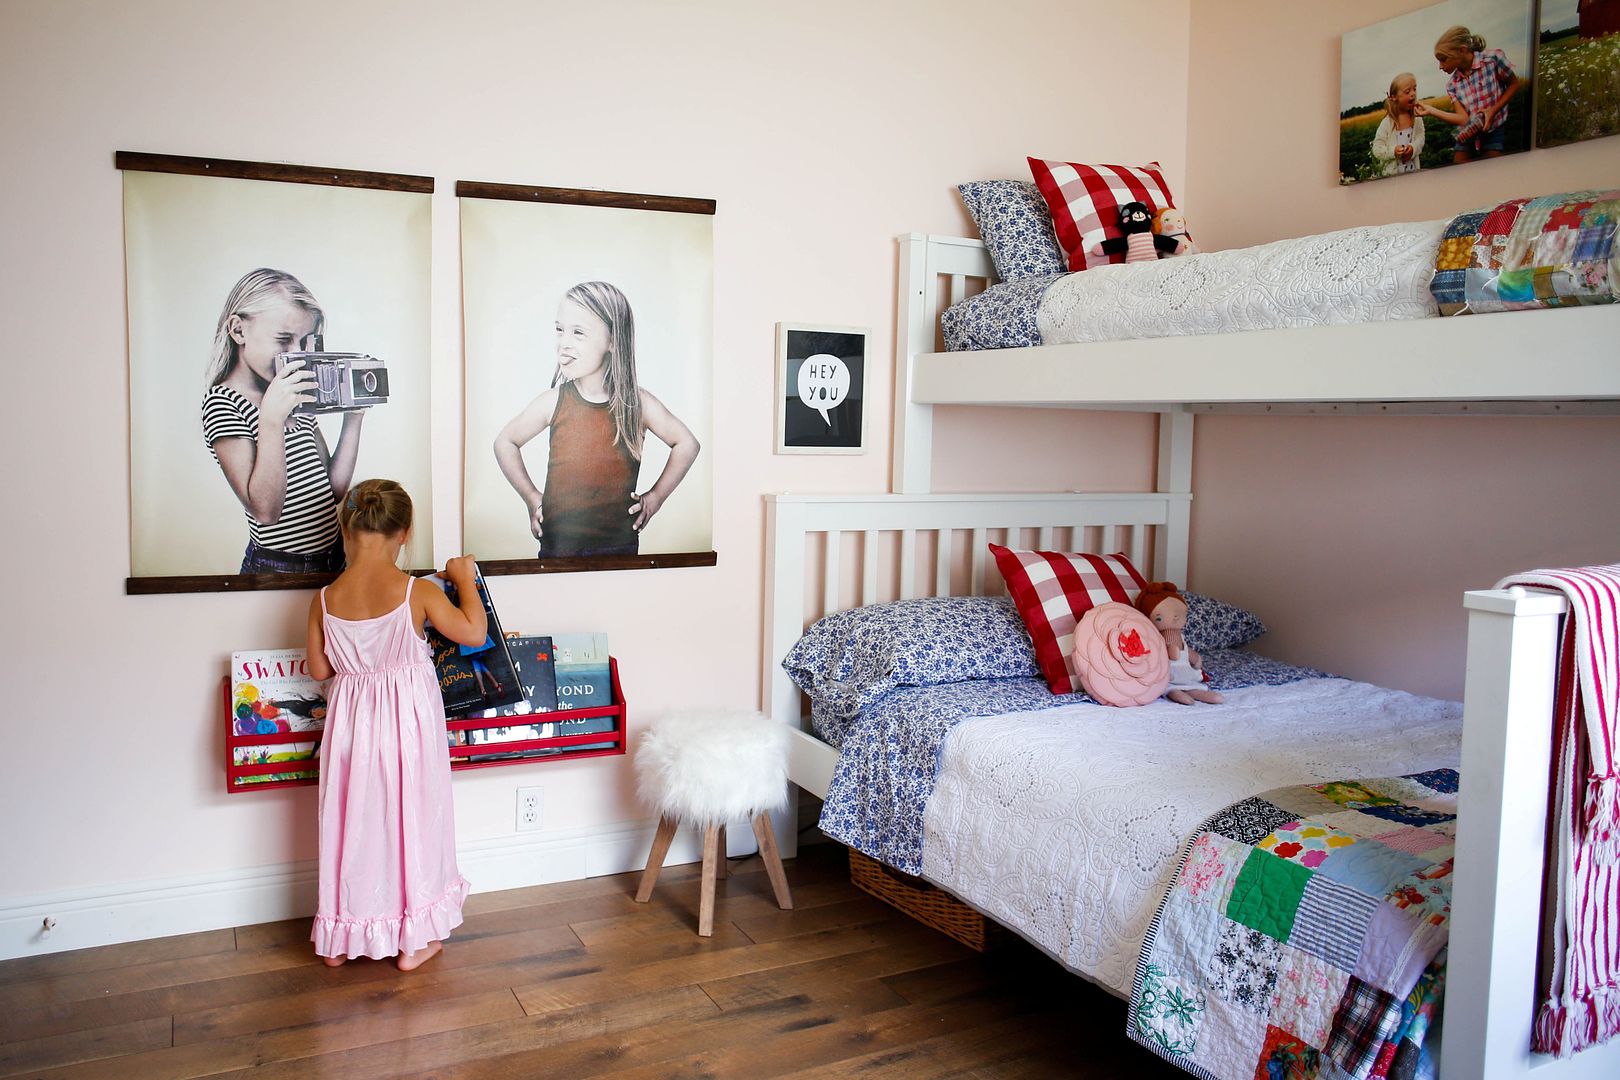
We switched the bedding with new sheets, pillows and versatile white quilts that can be paired with anything for a new look and still work with our prized Vintage Giggles heritage quilt made from all the kids’ baby clothes. The girls love the new space, and I practically made out with the new floors because they feel so fresh and clean.
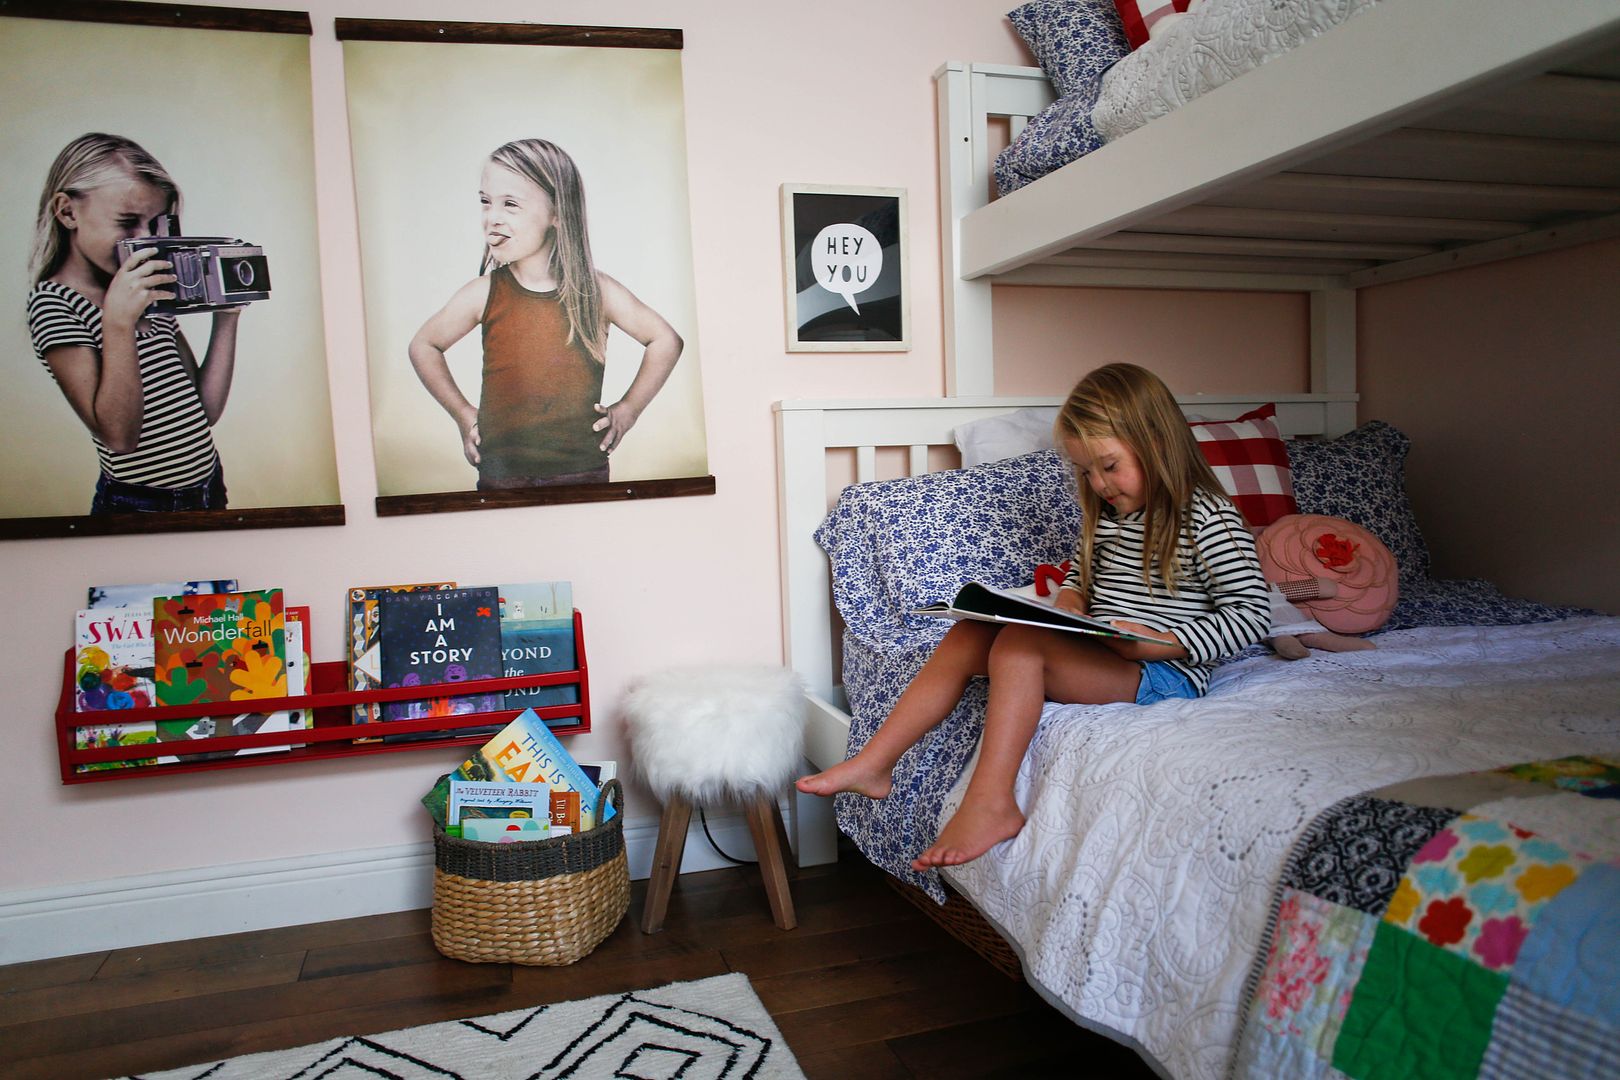
The large scale art prints of the girls take up an entire wall space, and I love how they turned out. If you’re interested, there’s a D.I.Y. at the end of this post for creating, printing and hanging prints like these.
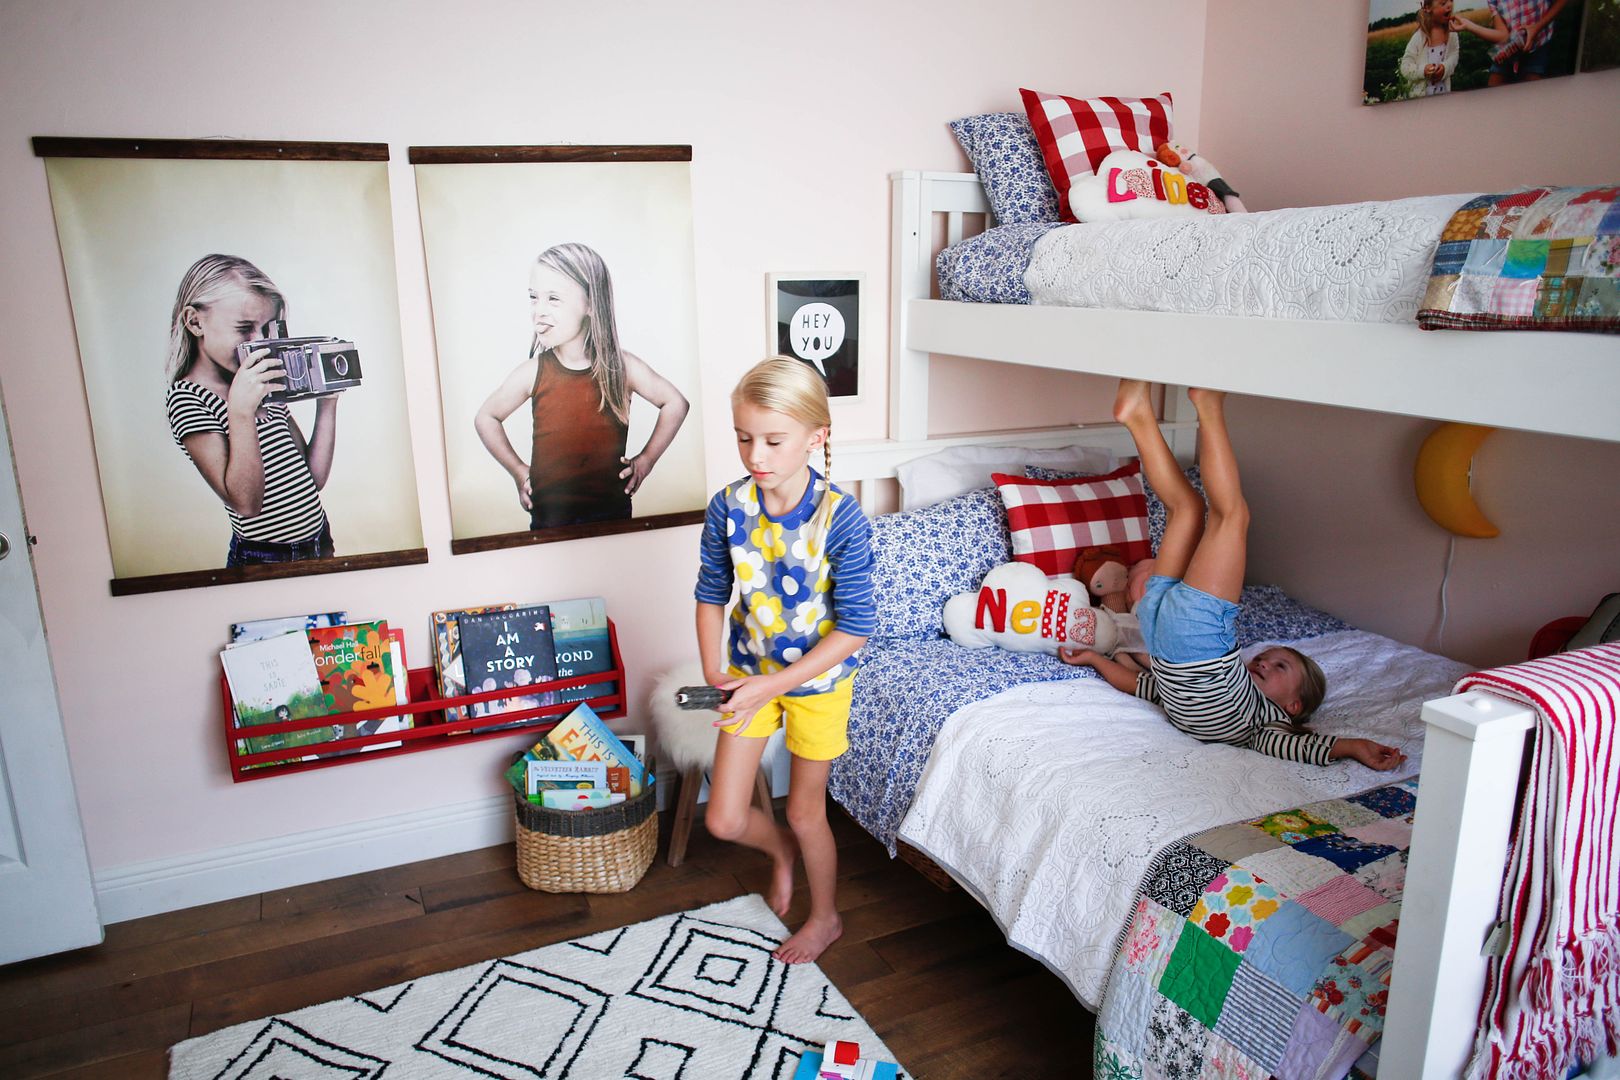
We have Nella’s sight words at her eye level everywhere in this house right now, and it’s so great for reminding us to work on them. You can’t walk down a hallway or into a room without stopping for a moment to pick a few out and test her. She loves it and is very proud of learning how to read.


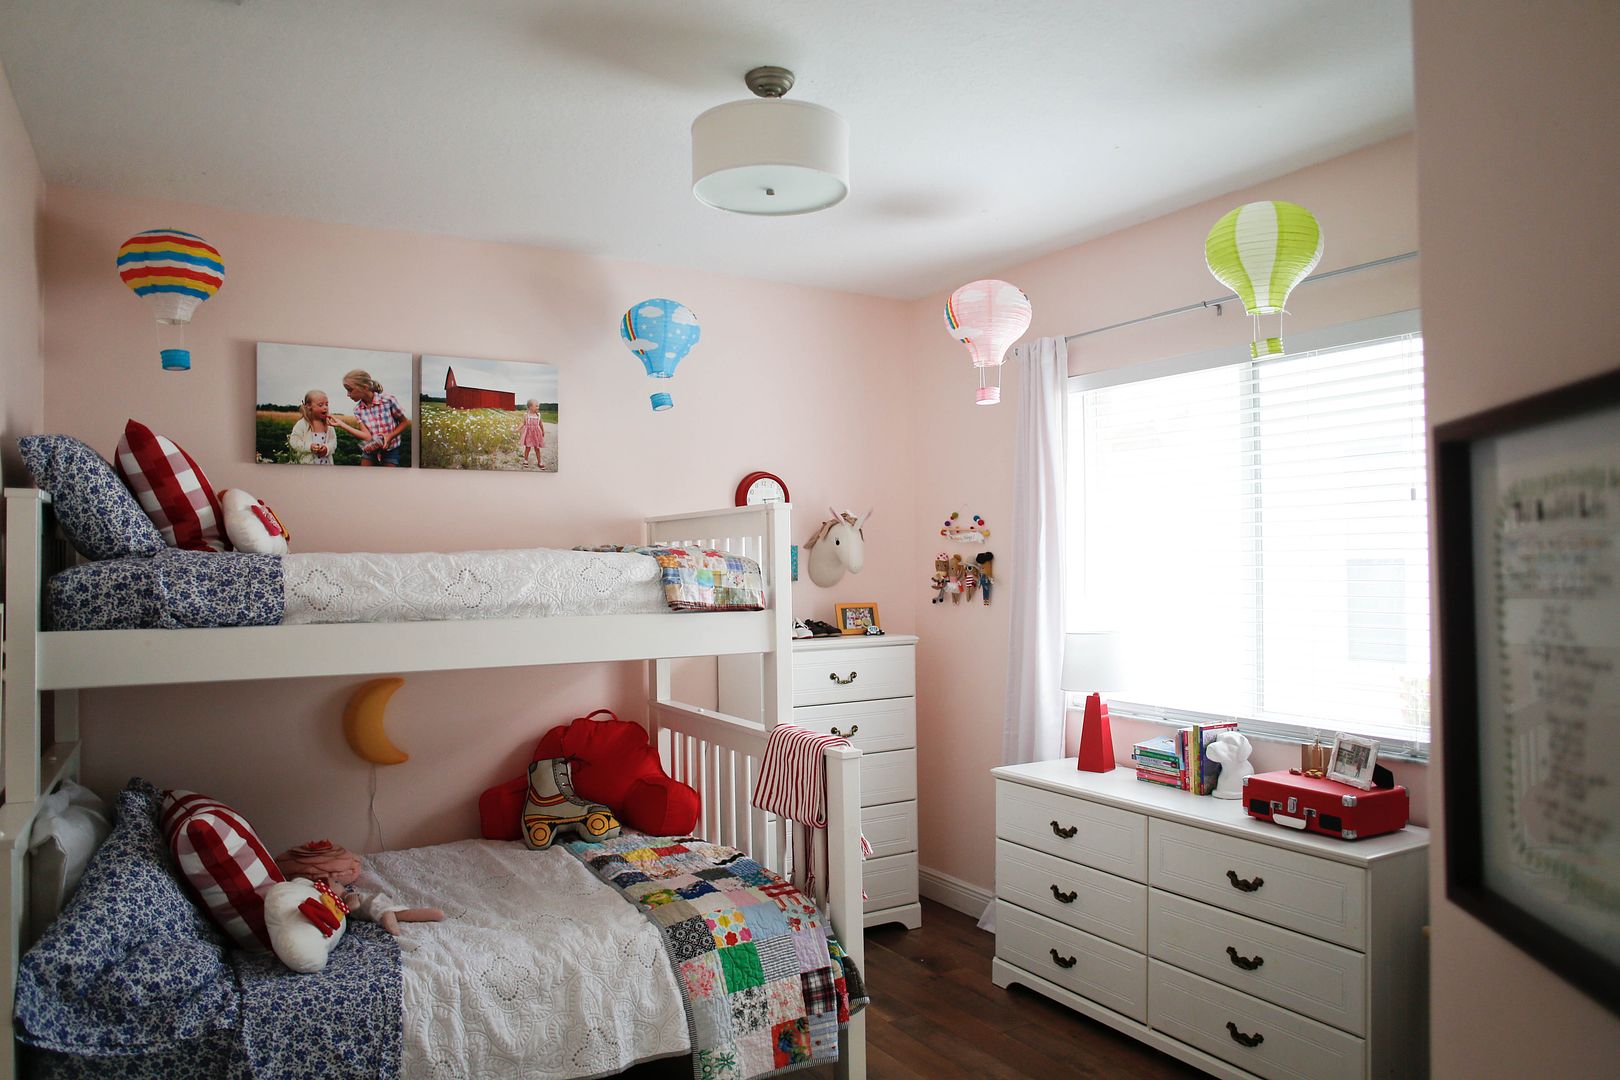
I love these reversible white quilts (gray on the other side) from Target. They were inexpensive, can be washed at home, and I love that I can create an entirely new bedding look by simply switching out the sheets and toss pillows. One of the girls’ favorite things in the room are the hot air balloon paper lanterns I found on Amazon. Dash isn’t allowed on the top bunk, I should add (we keep the ladder off, and usually there are bed rails on the side of the top bunk).


Will it stay this clean forever? Hell to the no. But it definitely helps to love your space so that you’ll want to keep it clean. In changing things up, we went through a lot of clothes and toys–got rid of what we didn’t need and organized the closet with designated places for games and crafts, so hopefully we’re on the right track. Also, these are fresh-from-transformation photos. We look forward to added bits of character with the girls’ artwork taped to the walls and handfuls of Shopkins and tiny treasures piled on the dresser.


Room Sources
Paint Color: Behr Island Hopping
Bed: Cargo Kids, purchased from our neighbors. Similar twin-over-full sets: this one ($420) and this super inexpensive set ($162!).
Primrose Blue Floral Sheets, Tommy Hilfiger: (found only one set at Marshall’s, found the other one on Amazon)
White Quilts (reversible with gray on the underside–love them!): Xhilaration, Target
Red Gingham Down Toss Pillows, “Hey You” print, fuzzy stool: Hobby Lobby
Moroccan Wool Area Rug
Hot Air Balloon Paper Lanterns (5-pack)
Moon Wall Light
Now for those big prints, one of our favorite things in their room:

You can make these from any photos you have, but I think they stand out best when you give them a studio look with a white background. With two sisters, I knew I wanted side-by-side photos, taken at angles so it looked like Nella was facing Lainey’s camera. You could create whatever fun look you wanted with these though–throw the kids in superhero costumes, have them making faces at each other, have one kid cupping their mouth “telling” a secret and the other holding their ear out to “receive” the secret…the possibilities are endless. I borrowed my neighbor’s vintage Polaroid for a prop for this shot (that her mother bought for her parents in the 60’s–still in perfect condition!), and created a studio in five minutes by rolling out my seamless white background paper in front of our garage (shot in natural light, but under the roof overhang for shade to avoid harsh sunlight) and securing it with hot pink duct tape because HEY NEIGHBORS! I AM SO PROFESSIONAL! This is how I do most of my “studio” shots as well as my friends’ Christmas card photos, and I always make sure I have a clean roll of white background paper in my closet.
Lainey stood in the corner to give Nella someone to look at and create the angle I wanted, and we repeated the shot switching the girls’ out at the other angle.

I edited these with a high-contrast/desaturated/vignette filter (I think it was “mystery bus” from the Totally Rad Lightroom presets) to give them a bit of a retro look.
As for printing these, I am fortunate to have a kind father-in-law who does all his own printing and thus owns very large printers that use canvas rolls, and he doesn’t mind printing photos for his daughter-in-law from time to time. But there are several online sources that will do the same, for less than a stretched or framed canvas. At UPrinting, you can order your print in a rolled canvas and have it custom sized to exactly what you want. For a 25 x 36 in. print like the ones hanging in the girls’ room, it runs about $37. Easy Canvas Prints also prints rolled canvas for about the same price. For a little less, you can skip the canvas and make the same display from large-scale regular prints. Costco makes a 20 x 30 print for $9.99. Just make sure you choose a photo with good image quality for blowing it up this size. Trim off any white border before hanging.
To hang them, I wanted to do something similar to this picture hanger we have for a print in our bedroom, but I knew I could make them myself. The print is basically clamped between two wood boards on both the top and bottom to create a casual framed look. I purchased flat 2-inch wood from Home Depot and cut 4 equal sections to the width of my canvas print (25 inches) so that each print would hang gripped between 2 boards–front and back–on both the top and the bottom (so, 8 total wood pieces, 25 in. each, for 2 hanging prints–have I lost you yet?). I should add that, while I like to make things, I’m often intimidated by D.I.Y.s that venture beyond a glue gun. So when I was using a power saw (dug through Brett’s tools without telling him and even figured out how to pop the battery pack in) to cut these on my own, I wanted to yell to all passing neighbors: “DO YOU SEE ME? I AM MAKING THINGS! I AM OWNING THIS SAW! LOOK AT ME! I CAN SAW THINGS ON MY OWN!” because I’m humble like that. You could leave the boards as is for a natural look, but I slapped a walnut stain on ours to richen them up. WordPress is telling me richen isn’t a real word, and they are so wrong.

I don’t have pictures of the this middle step, but stay with me…
Once the boards were dried, I laid my canvases on the floor and slid the “back side” set of boards under the top and bottom edge of the canvas, setting the canvas in place with a few strips of clear tape. Line up the “front side” set of boards on top so that the canvas print fits between them. Secure in place with a couple screws (“DON’T MIND ME, NEIGHBORS! I’M JUST USING A POWER DRILL FOR THESE SCREWS! LOOK AT ME!”) and tighten a nut (they’re called nuts, right?) on the back to lock in place.


I wound some wire around the top two screws to hang.

And there you have it.
A room for my sister bears. xo


Where did you get the red bookshelf? Love the new look!
It’s the large one from this Pottery Barn Kids listing: http://www.potterybarnkids.com/products/collectors-shelves/?pkey=e%7Cbookshelf%7C35%7Cbest%7C0%7C1%7C24%7C%7C23&cm_src=PRODUCTSEARCH
How cute ~ I love it. Love all the prints. 🙂
Looks good! I’ve been meaning to ask; where did you get the bunk bed?
What a wonderful, colorful, darling room that you created for two special girls. What girl could help but love it?
Love the beautiful girly room!! Where did you get the flooring from??
What do you do with all the canvases when you switch them out? Do you just store them, reuse them somehow? I love the look of all those canvases of all sizes, but I love change so much, I don’t want to spend money on them to hang them for just a little bit!
Yes please share flooring info:)
That is amazing. I am in awe, truly. Great job.
How very lucky Nella is to have such a special big sister in Lainey! I love the new look of the room…but even more so the way they interact with each other and the love that shows between them!
I hung two coat hooks with some string tied between then on the walls in my girls’ rooms and then put a bunch of colored plastic clothes pins on them. Whenever artwork comes home it gets clipped right up to avoid the entire room becoming a giant ball of scotch tape!
So cute! Every little thing looks fantastic!
Love seeing your makeovers! I love home projects.
Aww I just love this! You may have inspired me to redo my girls’ rooms.
Absolutely love the rolled canvas print. I was wondering did you use a special filter/effect for the picture?
Night and day..so fresh and cute..love it..
May I ask what camera you shoot with?
Your photos are always so beautiful..I know your eye is key:) But I would love to know.Thank you.
Monique
Love this room!
How does Lainey get up into the top bunk?
I love the way you paired the pink wall color with the primary brights. It all goes so perfectly without being matchy matchy. I wish I had an eye for color that way.
THANKS SO MUCH FOR THE INFORMATION ON HOW TO DO THE PICTURES OF THE GIRLS. I AM SO GOING TO TRY SOMETHING LIKE THIS.
I JUST DISCOVERED YOUR BLOG AND YOUR PHOTOS ARE WONDERFUL.
THANKS FOR SHARING!
This is awesome! We just finished a similar project – though not a bedroom. I totally get you on the dog peed on carpet though :/
You made me laugh out loud when you said have “I lost you yet?” My eyes started to glaze over as soon as you said to whip out a roll of white paper. The room looks so beautiful though! Love the pink you selected.
I really love how you did their room. It’s just lovely! My son and daughter share a room (and they will continue to do so with Baby #3) and I’ve been thinking bunk beds might be in their futures… distant distant futures haha.
https://wanderlustingbydesign.com/2016/09/22/sharpie-subway-tiles/
Just when I think you have come up with the coolest idea ever you come along with another one. I love, love the prints.
Where did you find the name pillows? Etsy shop?
Yes! I’ll see if I can find it. She was in Spain.
Our bedroom is the same color and I LOVE it. It’s such a sophisticated but fun pink! It also looks good with dark wood/wrought iron accents. It works as a sort of Miami/Palm pink. I didn’t know I could love a paint color so hard.
Kelle, the details of the room make it absolute perfection! I especially love all the pictures you chose and the eye you had in dreaming this whole room up. Great job. Thank you for sharing!!
Did you use a similar process for the unframed large photo in the last shot (with your daughter in the polka dot bathing suit)? I love that one too!
What a darling room! Great job in organizing and creating the look!
Very Very nice ! good judgment and decorative. Thanks for sharing……..
Love the transformation. I never thought about hanging canvas like that! I am a pro photographer and usually just order my canvas on a stretch frame from my lab, but I LOVE this idea! My husband recently asked me to decorate our home with my artwork instead of store bought (I am a nature/landscape photographer) so that is what I am in the process of doing!
=) Bridget | http://texasphotog.com
What a lovely room! I love how their pictures are displayed on their bedroom wall!
The room is amazing! I have been looking for new bedding ideas for my little kids’ room, but it never occurred to me to use white. Imagining all the fun pillow possibilities now! I’m also totally making those prints, like today.
So cute! I love the pictures on the wall.
Beautiful!!! All of the above!! Absolutely Lovely!! ^_^
Very Nice! Thanks for sharing the post!
Where did you find the City in a Bag items – the little wooden toys from NYC? I have been looking for them everywhere and can’t seem to find anyone selling them. I LOVE the DIY photos too. Thank you for sharing the room!!
I actually got them on a visit to New York City, so I’m sure that doesn’t help much. I believe it was from the MOMA store.