Enjoying the Small Things

Enjoying the Small Things

  • ABOUT
    • KELLE HAMPTON + ETST BLOG
    • Our Down Syndrome Journey
    • Down Syndrome: Our Family Today
    • PRESS
  • the book
  • The Blog
    • Make Stuff
    • Family
    • Favorites
    • Parenting
    • Parties
    • Style
    • Travel
  • Once Upon A Summer PDF
  • Printables
  • CONTACT

Rainy Day Fix: Wildflower Soap Making

July 13, 2015 By Kelle

Northern Michigan cabin: check.
Rainy day: check.
Lots of coffee: check.
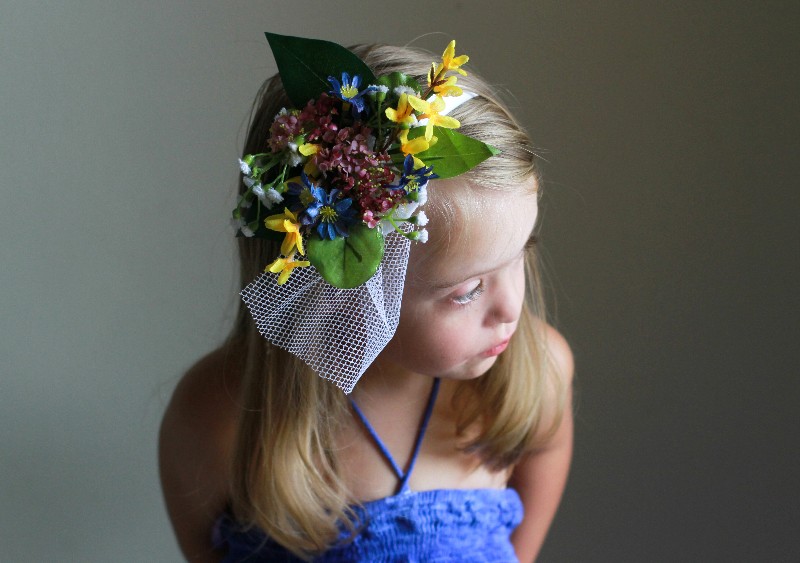
Wildflowers we saved and dried from last week: check.

“You want to make soap?” I asked my cousin this morning as the sky turned gray.
“Sure,” she answered, putting her coffee cup down, as if “let’s make soap” is an everyday occurrence.

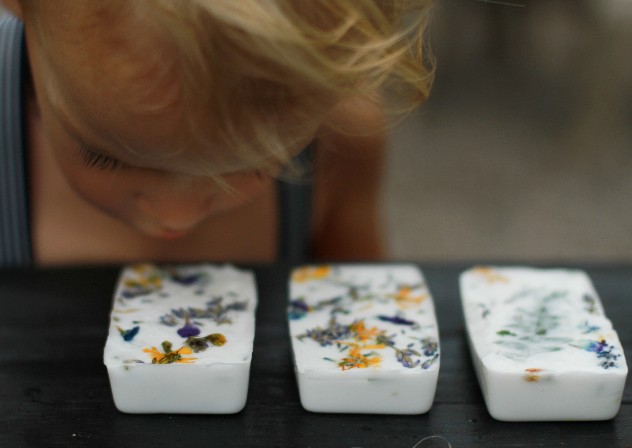
Truth is, knowing we were coming to hide away in the woods for a few weeks, I researched a  little soap making and brought a soap tray and a big block of shea butter even though I’ve never actually made soap before. It seemed fitting. And after the extremely satisfying sensory ritual this morning, I’m thinking there will be more of this in the future. The textures, the smells, the pouring, the waiting and the finished canvases, their milky white surface speckled with nature–I’m sold.

We bought our dried lavender from a lavender shop in Glen Arbor. They let us walk through their gardens last week.

 photo print 30_zpsyqpa83q0.jpg

 photo print 32_zpsejn0szx4.jpg

 photo print 31_zps9raeftjs.jpg

The rest of the wildflowers, we collected from walks around the cabin.

 photo print 50_zpslkjp5zhs.jpg

We made Lavender Eucalyptus soaps and used the following (links provided):

Shea Butter Suspension Soap Base (we used half of this block for 4 bars of soap)
Soap Mold Tray (used an inexpensive plastic tray from Hobby Lobby, but similar to this one)
Eucalyptus oil
Lavender oil
Dried Lavender
Assorted colorful wildflowers

Place a few dried flowers in the bottom of soap mold tray.

 photo print 91_zps1cpskyia.jpg

Melt shea butter in microwave. It melts pretty quickly. We used half of the two-pound block and broke it in a few pieces in a microwave-safe bowl–added 30 seconds, checked it, added 30 more, etc. until it was melted thoroughly. Add essential oils. We added 30 drops of each lavender and eucalyptus for 4 bars of soap. Sprinkle in several dried flowers but save some to “garnish” the tops of soaps. Carefully pour melted soap mix into molds.

 photo print 93_zpszkafldop.jpg

Arrange more dried flowers on the top of soap, pressing lightly to “set” them into the soap. Let dry. Soap will set in 20-40 minutes. To remove, press mold upside down and apply constant pressure on each bar of soap until it releases.

 photo print 92_zps2kmqzlcr.jpg

 photo print 94_zpsaiqvm8g6.jpg

We tested the product, and it’s marvelous–smells wonderful, suds lightly, and it’s very moisturizing but not greasy or waxy.

 photo print 95_zpsneh3anas.jpg

 photo print 97_zpsdxlinuel.jpg

Dear friends at home…so much soap coming your way.

And if you give a mouse a rainy day and new bar of soap…he might as well go get dirty in some mud puddles.

Filed Under: Make Stuff, Travel 13 Comments

Wildflower Fascinators

June 15, 2015 By Kelle

Make Wildflower Crowns is always on our summer bucket list, but we’re pumping it up this year, taking inspiration from British royalty and turning our wildflower crowns into fascinators. Actually, we have a fancy tea planned in Michigan this summer and I was looking for hats for the girls and decided we’d make fascinators instead. I still wanted a soft and summery feel, so we went the wildflower route–silk because real ones wouldn’t make it in our suitcase.

 photo print 9 text_zpsqksagshb.jpg

They were super easy to make. Bigger kids could probably make them on their own (calls for a glue gun), and littler kids can at least assist in the designing phase.

 photo print 12_zpsdj9mzsnb.jpg

Materials needed:

 photo print 2 with text_zpsomcl3bfb.jpg

Cut a piece of mesh tulle (which will stick out or hang over fascinator depending on the look you want) to desired length. Fold a few pleats into it and hot glue into place on stiff felt circle, leaving plenty of tulle to hang off the edge.

 photo print 4_zpslvv3l5hu.jpg

Design floral arrangement, overlaying leaves and flowers and hot gluing into place as you work.

 photo print 5_zpsxngztcs4.jpg

I handled the hot glue gun, but Lainey enjoyed creating the layout of her fascinator and telling me where to glue.

 photo print 6_zpsjtfplpmc.jpg

Try headband on and play around with where to place the felt circle to achieve desired look. When you have it how you like it, hot glue felt circle onto headband. The circle adheres better and stays put on thicker headbands.

 photo print 7_zpsi3iic263.jpg

Now look in the mirror and smile, dahling.

 photo print 8_zpst6s5ribz.jpg
Her my-dad’s-trying-to-make-me-laugh-but-I’m-not-going-to face.

Fancy, fancy.

 photo print 1_zpssclsykbi.jpg

I wanted to make a natural fascinator, so I went foraging around our yard and found some greenery and a few flowers from bushes that turned into a fun one with a bit of a Carmen Miranda twist. It would be cute with a white dress for a tropical party. Or, better yet, to walk around the house, sip lemonade and feel fabulous.

 photo print 11_zpswj4lcfbl.jpg

Real flowers are a little heavier and I wanted to weave the stems in before hot gluing, so I used a canvas circle (found in needlepoint/crosstitch aisles of craft stores) cut to 3.5 inches.

 photo print 13_zpsmybl3ybk.jpg

I poked a few flowers in to create a base (you may need to cut open the canvas grid in a few places for larger stems).

 photo print 14_zpsk81lql5f.jpg

And then filled in the rest with the hot glue gun to secure everything…

 photo print 15_zpsmycd3qkl.jpg

…clipped all the stems off the back, and glued a felt backing before securing to headband.

 photo print 16_zpsh0v3t8oy.jpg

Now we’ll have to make tea and twirl. Twist my arm.

 photo print 18_zpsvm1lqdqi.jpg

Filed Under: Make Stuff 8 Comments

Summer Dreams: 4 Ways to Make a Summer Bucket List

May 20, 2015 By Kelle

Technically, I’m not a list girl. I make grocery lists and lose them, type Christmas lists and veer away from them and write to-do lists only to leave most of the tasks undone. But there’s something motivating about writing the list itself. It’s an exhale, a first step and, in the case of gratitude lists and bucket lists, an extremely satisfying creative exercise. Every year before Thanksgiving, I make a list of what we need for dinner. That one usually actually makes it to the grocery store, but more than anything, writing the list–usually with coffee in hand and a pile of cookbooks near me–serves to stir up holiday excitement–a prequel to the sensory experience of tasting gravy, peeling apples and clinking wine glasses.

Summer bucket lists are the same for us. It’s less about pressure to do the things we put on the list and more about marrying my kids’ enthusiasm for fun and family and adventure with my own childhood memories. And it’s a great way to put all our ideas in one place. I’m notorious for throwing out the names of movies I want to see, but when we actually sit down and Brett says “pick a movie,” I can’t think of anything to watch. Summer adventures are the same way. Write them all down early at the beginning of the summer so you don’t have to scramble for ideas later.

Here are four different ways to make a summer bucket list this year:

 photo print 30_zpstd9oegev.jpg


Scrapbook Summer Bucket List

Using any old scrapbook or even a homemade one hole-punched and tied with yarn, space your summer bucket list items out with room for a photo above them. This gives your family an extra fun challenge of documenting your memories throughout the summer. As you fulfill your bucket list items, take pictures of your adventures, print them and tape into place in your scrapbook. Instant film cameras (we have this Fujifilm Instax camera) make this list much easier to complete. Or you can send your photos to print and ship straight from your phone with many different companies’ print apps. We’ve used Social Print Studio which prints tiny squares and ships incredibly quick.

 photo print 5_zpsb5vjktnm.jpg


Keep It Simple

If summer bucket lists overwhelm you or if you’re working a lot through the summer, keep it simple by making a small doable list one week at a time and display it somewhere your family can see it–the kitchen counter or dinner table. Your list doesn’t have to include “whittle birch branches into medieval swords and host a neighborhood castle party” to make it a good bucket list. Think small and meaningful–a family moon walk, microwave s’mores, eat breakfast for dinner. When I want to feel super productive, sometimes I put everyday things on lists just so I can cross them out: Take a shower. Drink coffee. CHECK! CHECK! Look at me, gettin’ ‘er done. Kids love visual reminders and crossing things off too. So go ahead, put “read two books before bed” and “paint nails a pretty summery pink” on that weekly list even if you were already planning on doing them.

 photo print 10_zpsjuj3hbej.jpg


Grab Bag Bucket

This is a great way to inject a little mystery into the game–you never know what you’re going to pull out. At the beginning of the summer, have your kids help you write bucket list items down on slips of paper, fold them up and throw them into an actual bucket.

 photo print 9_zpsbpmoenqf.jpg

Take turns throughout the week–after dinner, on a rainy afternoon, on a wide open Saturday–pulling slips out, reading them aloud and fulfilling them together.

 photo print 8_zpsattb2u81.jpg


Scout’s Vest

This is how we’re fulfilling our Michigan summer bucket list this year, and we can’t wait. Here’s the thing. We tried Girl Scouts last year, but we missed so many meetings and couldn’t keep up with everything else going on. We loved the meetings we did have but, you know….life. The vest though. We never got the damn vest. We are going to reclaim it, summer style. I thought of this early this year and started collecting iron-on patches, going on mad searches for rare ones, anything that fit our summer plans–and I found them! I found tiny s’mores patches and lighthouse patches, a doughnut for our breakfast-on-the-pontoon-boat dreams and even a Mackinac Island one. I’m sure you can easily make a sash with a strip of fabric, or they have inexpensive ones here.

 photo print 6_zpssshtie05.jpg

As we knock off our bucket list items, we’ll iron on corresponding patches, and the kids will get to wear their summer scout sashes and have a wonderful memento from our road trip.

 photo bucket list 1_zpsguggx7rx.jpg

We found most of our patches on Amazon including movie night, catching a fish, doughnut breakfast, flying kites, kayaking, corn on the cob, and campfire.

Would I be a big dork if I made one too? They don’t have my size.

While we wait for summer, we have desks to clean out, classroom parties to plan and a few more lunches to make. I’m so excited for not having to pack lunches soon!

Woman Crush Wednesday will return next week.

 photo print 23_zpsm4wiclq3.jpg

Filed Under: Make Stuff, Mamahood 24 Comments

  • « Previous Page
  • 1
  • …
  • 11
  • 12
  • 13
  • 14
  • 15
  • …
  • 23
  • Next Page »
  • Facebook
  • Instagram
  • Pinterest
  • RSS
  • Twitter

Popular Posts

Shop My Favorites

Keep In Touch

Bucket Lists

ARCHIVES

Archives


“One of the most emotionally stirring books I’ve ever read….a reminder that a mother’s love for her child is a powerful, eternal, unshakable force.”
Ree Drummond, The Pioneer Woman
  • Home
  • About this Blog
  • BLOG
  • BLOOM
  • Favorites
  • Parties
  • PRESS
  • CONTACT

Copyright © 2026 · Kelle Hampton & Enjoying the Small Things · All Rights Reserved